Creating experiments via Campaigns module inside Teepee
Unlike standard experiments, experiment via Campaigns module inside Teepee do not require developer input to set up and run on sites. An example of experiment via Campaigns module includes testing primary banner design, introducing a new widget on homepage, or adding a new widget to the list page. Below are the steps you need to follow.
You need to setup your campaign in Campaigns module inside Teepee before filling create experiment form in the UI, set the campaign as an experiment in Campaigns module, and approve your campaign.
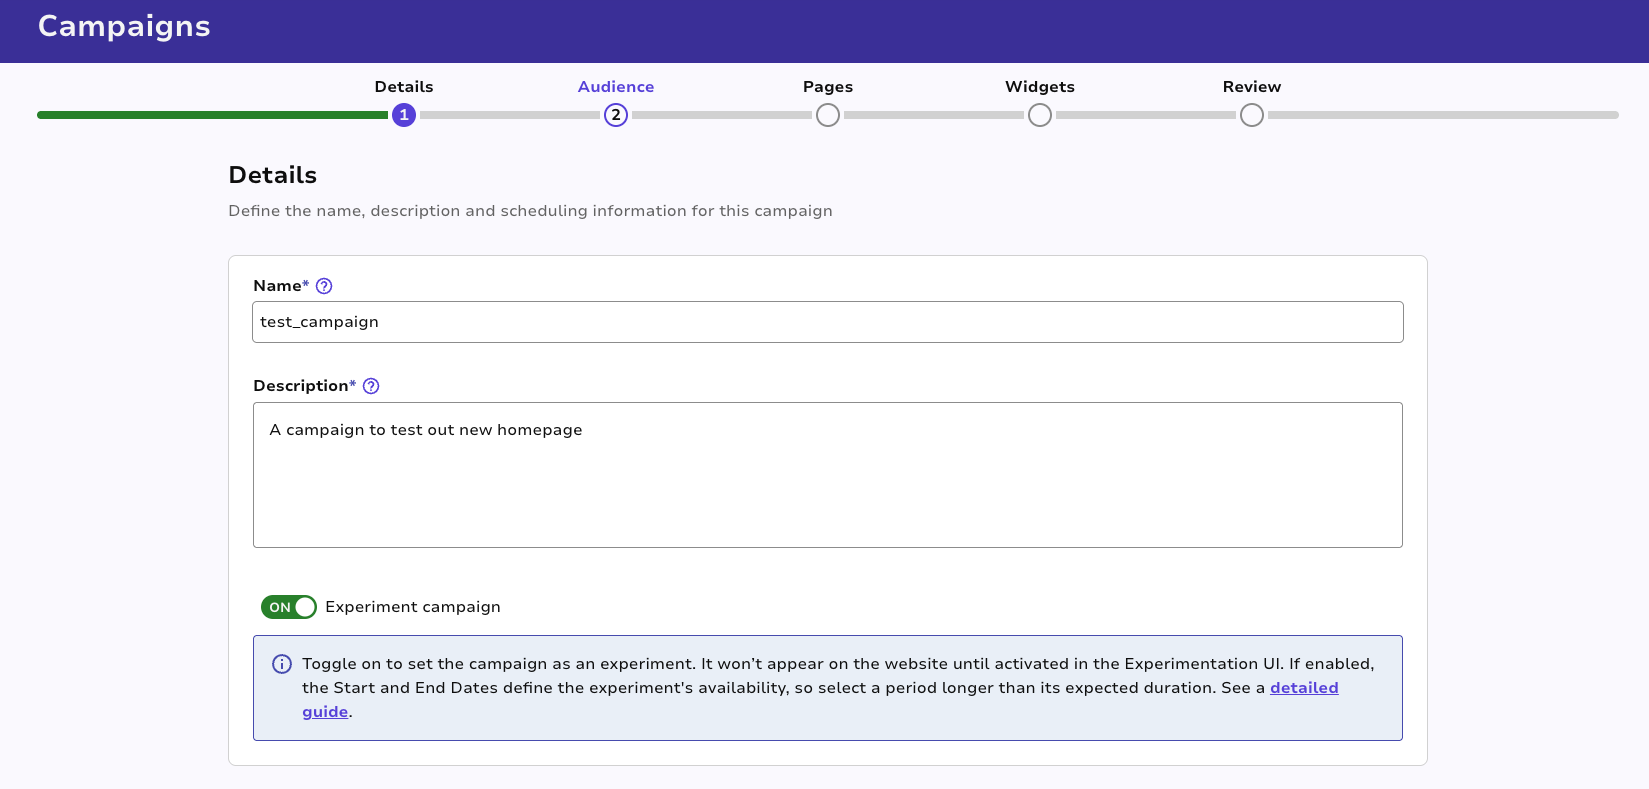
Go to “Create” section in the Experimentation UI, then fill in the experiment form.
Form Fields Overview
Below is a quick overview of the main fields in the form:
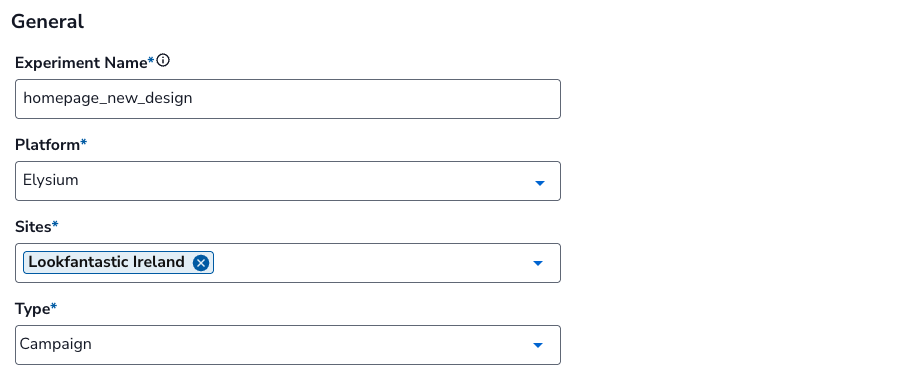
Experiment name
A textbox where you can enter the experiment name in. You cannot leave this empty. You can write any name that describes the experiment itself. Please find the requirements for naming convention as below.
-
No spaces allowed, instead, underscore (“_”) should be used.
-
You can use alphabetical characters (a-z, A-Z) and numerical digits (0-9)
-
Please suffix with wave_01, if it’s the first wave of this experiment, or wave_02, wave_03, etc, for sequences of experiments improving on the same feature. This is not enforced, but is advised for clarity.
-
Example:
Suitable experiment name: auto_scroll_true_vs_false
Unsuitable experiment name: auto scroll true vs false
If an experiment is created for testing/QA purposes, please prefix with \test_. Example: \test_auto_scroll_true_vs_false
Sites
A dropdown that lets you select the website you want to run your experiment. You can click multiple websites in this section.
Type
Select “Campaign” for experiment created via Campaigns module inside Teepee.
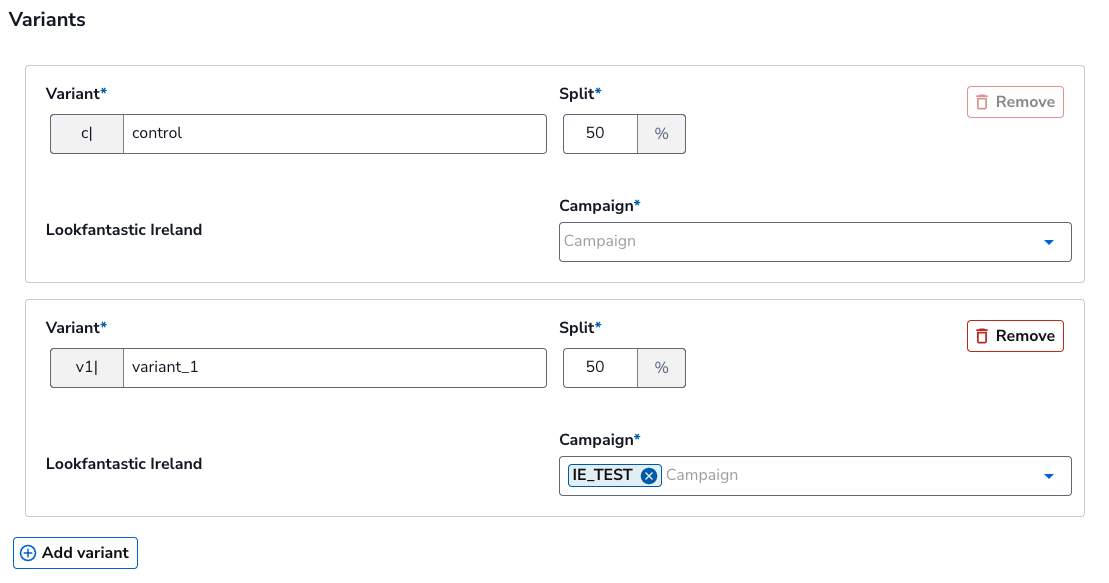
Variants
You can write your variant names and traffic split in this section. Please find the requirements for naming convention as below.
-
No spaces allowed, instead, underscore (“_”) should be used.
-
You can use alphabetical characters (a-z, A-Z) and numerical digits (0-9).
-
Prefix with c| for control, v1| for the first variant, v2| for the second etc. - The Experimentation UI does this by default, so you only have to type the names without prefix.
-
For control, the standard naming is c|control when it reflects the default version of the site.
-
Example:
Control: c|control
Variant 1: v1|auto_rotate_banner
Variant 2: v2|manual_rotate_banner
The traffic split allows you to decide how much traffic to allocate to each variant. The traffic split must add up to 100%. Variants section can support up to 8 variants.
You need to select the Campaign you have created in Campaigns module inside Teepee in your variant section.
As an example, in the variant setup below, we have 2 variants: control and variant_1.
Control is the current look of your site, and variant_1 is the change you’ve made.
Make sure to include your Campaign in the variant_1 section to ensure the changes are tracked correctly.
Experiment start and end date
You cannot select or enter a start or end date earlier than the current date.
The end date must be later than the start date.
The minimum duration for running an experiment is 4 weeks. If you wish to run an experiment less than 4 weeks, please consult with the Experimentation team.
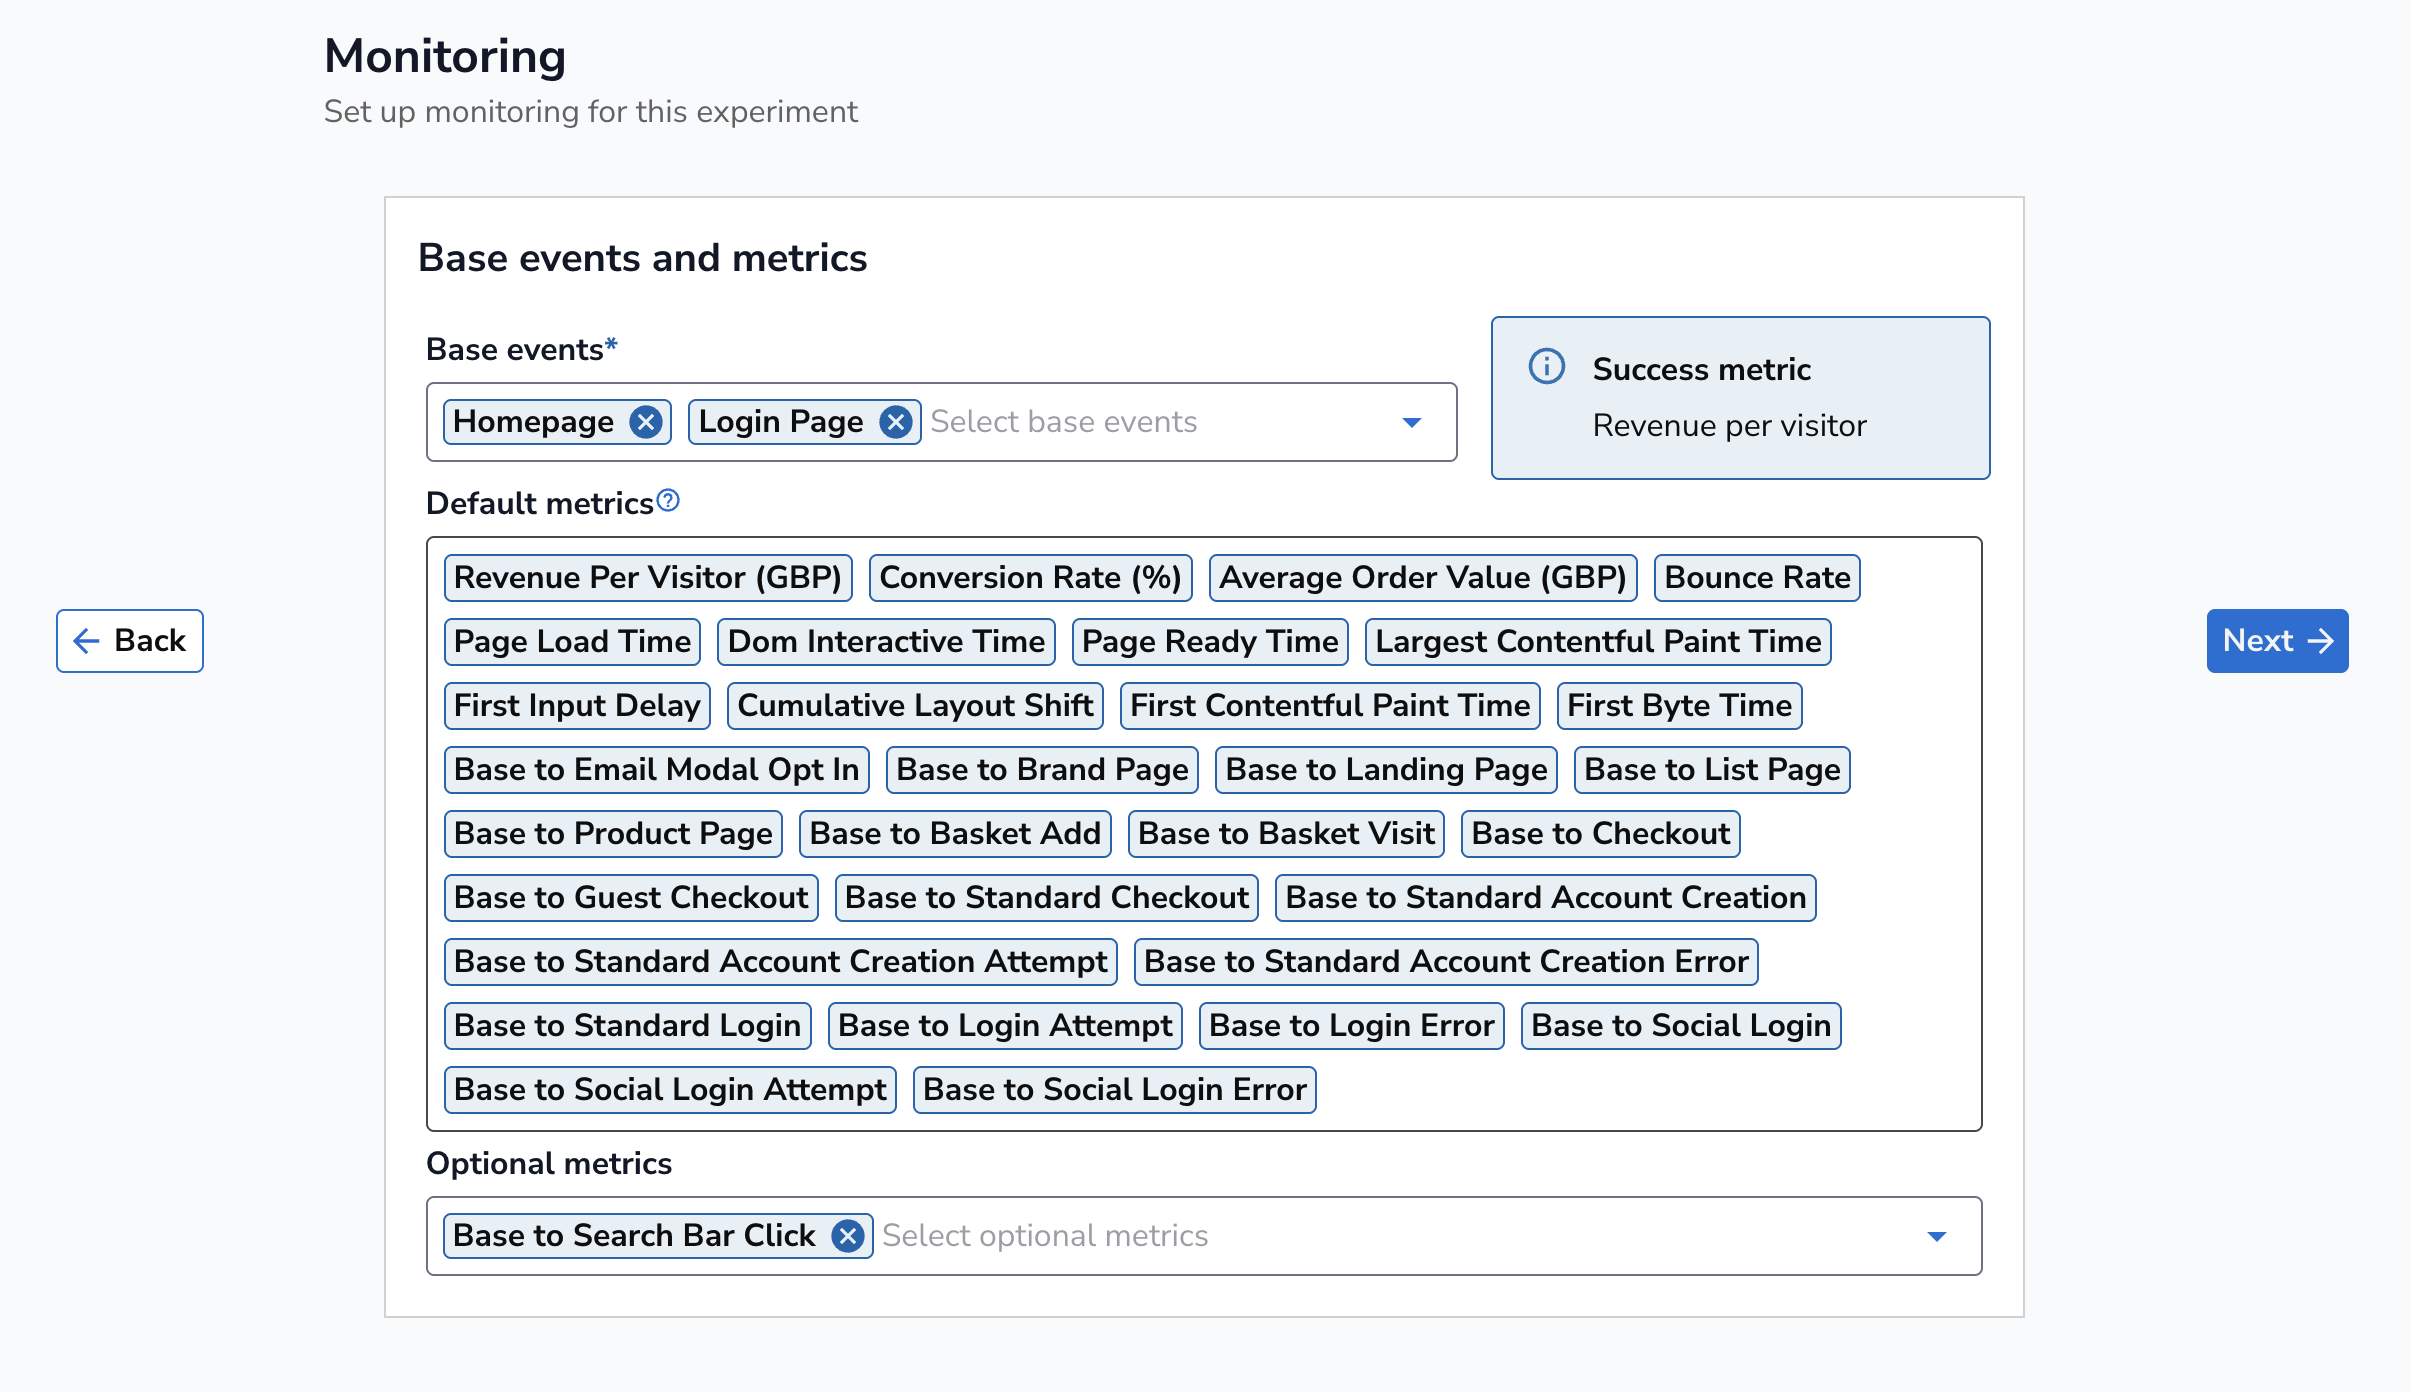
Base events and metrics
You can select the section or page of the website where your experiment will take place. Choose this based on the changes made in your experiment. For instance, if your experiment is on the homepage, select “Homepage” in this field. You can select more than one base event if your experiment impacts multiple sections or pages, such as the homepage and the product page.
The default metrics are the key metrics we have pre-populated based on your base event. You can select additional metrics in the optional metrics section if necessary.
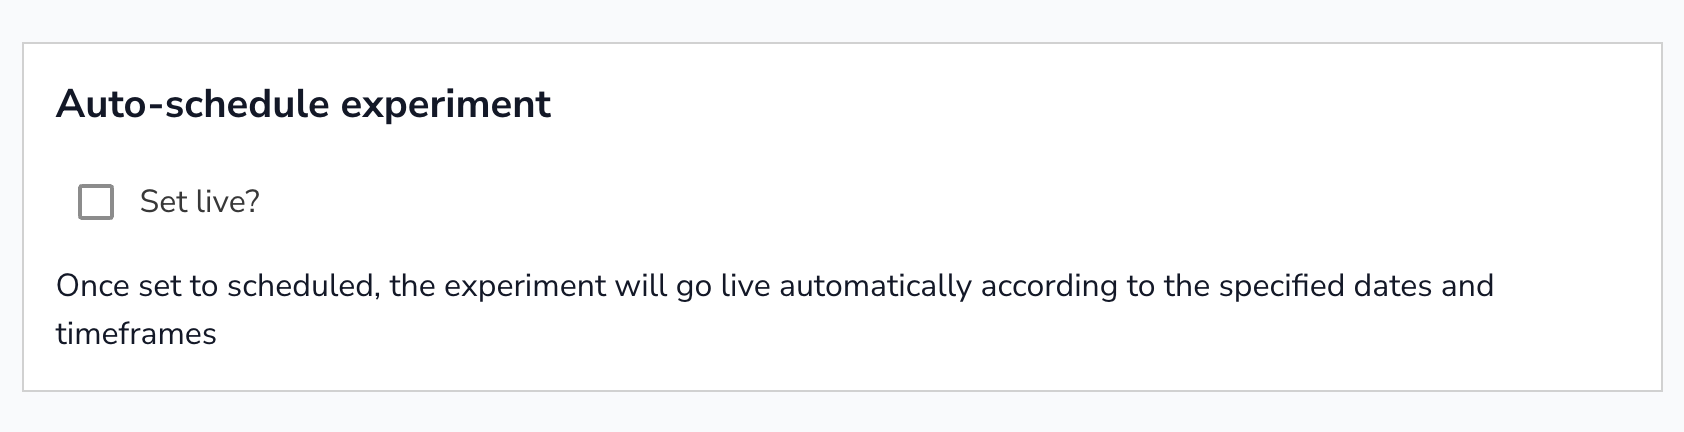
Set live tick box
A checkbox that, if selected, will automatically set the experiment to go live at the selected start date and time. If left unchecked, the experiment will be paused if the current time is later than the start time. You can schedule the experiment and set it live later on after getting approval from the Experimentation team.
You can now view the details of your experiment. Please refer to the managing your experiments section on how to view experiment details.